Yamaha MG06X User Manual: A Comprehensive Guide
Welcome! This comprehensive guide details the Yamaha MG06X mixing console, offering insights for optimal performance and longevity․ It’s designed for both beginners and experienced users, ensuring a smooth and productive experience․
This manual covers setup, operation, features, and troubleshooting, helping you unlock the full potential of your MG06X mixer․ Please retain this document for future reference and assistance․
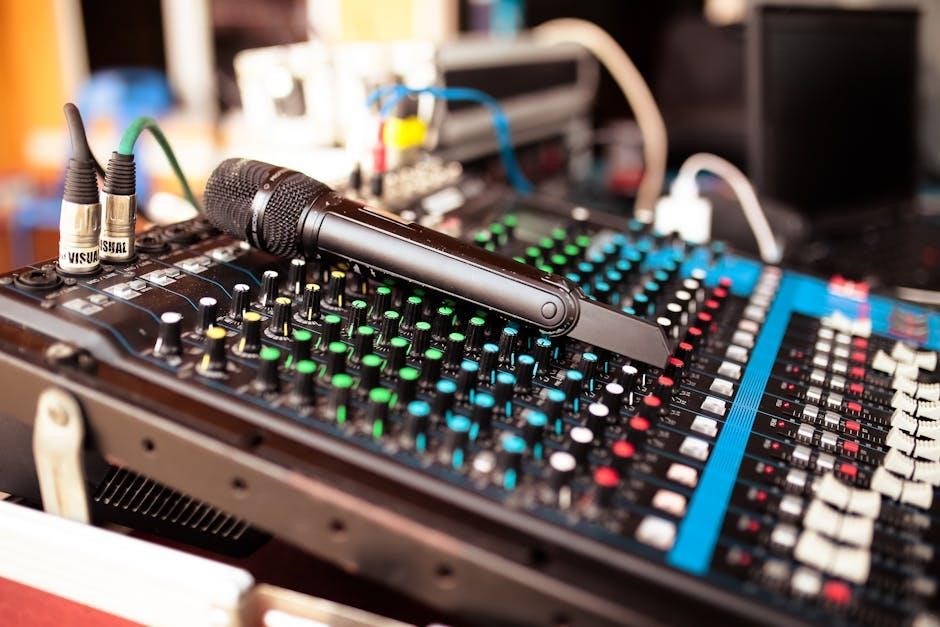
The Yamaha MG06X is a versatile 6-channel mixer designed to deliver professional-quality sound in a compact and user-friendly format․ This mixer caters to a wide range of applications, including live performances, recording sessions, podcasting, and home studio setups․ It features microphone inputs, stereo/mono line inputs, and Yamaha’s renowned D-PRE microphone preamps, ensuring exceptional audio clarity and fidelity․
A key highlight of the MG06X is its integrated SPX digital effects processor, offering six high-quality effects to enhance vocals and instruments․ The mixer also incorporates a PAD switch on channels 1/L and 2/R, accommodating diverse input sources․ Yamaha prioritizes ease of use, making the MG06X accessible to both novice and experienced audio engineers․ This manual will guide you through every aspect of the mixer, from initial setup to advanced features, maximizing your creative potential․
Ultimately, the MG06X aims to provide a reliable and powerful mixing solution for all your audio needs․
Unpacking and Included Accessories
Upon receiving your Yamaha MG06X mixing console, carefully inspect the packaging for any signs of damage during transit․ Once opened, verify that all included accessories are present․ Your MG06X package should contain the following items:
- Yamaha MG06X Mixing Console: The core unit itself, featuring six channels and integrated effects․
- AC Power Adapter: Essential for powering the mixer; connect it to the DC IN [12V] jack․
- Owner’s Manual (this leaflet): This document provides comprehensive instructions for setup, operation, and troubleshooting․
If any items are missing or appear damaged, immediately contact your retailer or Yamaha customer support․ Retain the original packaging for potential returns or servicing․ Ensure you have a suitable power outlet available before proceeding with setup․ Familiarize yourself with the location of each component to streamline the initial configuration process․
Safety Precautions
Important Safety Instructions: To ensure safe operation and prevent potential hazards, please adhere to the following precautions․ Always connect the AC power adapter to a grounded outlet and avoid using damaged power cords․ Never expose the Yamaha MG06X to excessive moisture or liquids․
Do not attempt to disassemble or modify the mixer, as this could result in electric shock or malfunction․ When connecting or disconnecting cables, ensure all volume levels are set to minimum to prevent loud noises․ Always follow the recommended power-on/off sequence – power on the mixer before connecting speakers, and vice versa when powering down․
Keep the mixer away from heat sources and direct sunlight․ If you encounter any unusual odors or smoke, immediately disconnect the power and contact qualified service personnel․
Setting Up the MG06X
Begin your setup by securely connecting the provided AC power adapter to the unit’s DC IN [12V] jack and a suitable electrical outlet․
Connecting the Power Adapter
Powering the MG06X is a straightforward process, crucial for operation․ First, locate the DC IN [12V] jack on the rear panel of the mixer․ Carefully connect the included AC power adapter to this jack, ensuring a snug and secure fit․
Next, plug the AC power adapter into a standard electrical outlet․ Important safety note: Always verify the outlet voltage matches the adapter’s specifications to prevent damage․ Before powering on, double-check all connections․
The MG06X does not feature a traditional power switch; it activates when the adapter is connected and plugged in․ To avoid unexpected loud noises, always turn on connected speakers or headphones after powering on the mixer, and reverse the order when powering down․ This sequential approach safeguards your hearing and equipment․
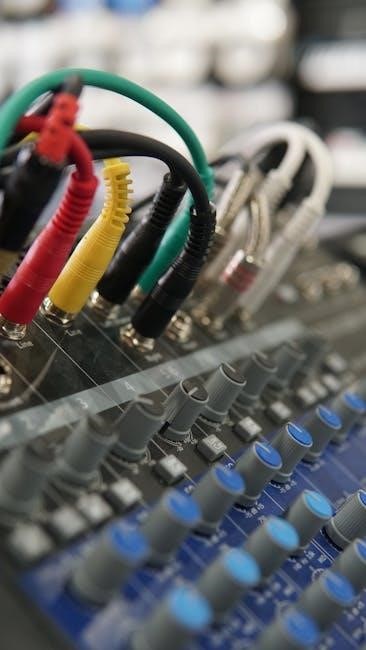
Input Connections: Channels 1/L & 2/R
Channels 1/L and 2/R on the MG06X are versatile inputs, accepting both microphone and line-level signals․ These channels feature a combined XLR/TRS jack configuration․ For microphone connections, use an XLR cable․ For balanced line-level signals, also utilize an XLR cable․ Unbalanced line-level signals can connect via a TRS (Tip-Ring-Sleeve) cable․
The MG06X also incorporates a PAD switch on channels 1/L and 2/R․ Engaging this switch attenuates the input signal, preventing distortion when connecting high-output sources․ This is particularly useful for instruments with strong signals․ Remember that these channels serve as the primary inputs for mono sources or the left and right sides of stereo signals․
Carefully connect your audio sources to these jacks, ensuring proper cable connections for optimal signal quality․
Input Connections: Stereo/Mono Line Inputs
The Yamaha MG06X provides additional input flexibility with stereo/mono line inputs․ These inputs, typically used for keyboards, audio players, or other line-level sources, utilize standard 1/4-inch phone jacks․ Connecting a mono source to a single jack will result in a mono signal on that channel․
For stereo sources, utilize both the left (L) and right (R) inputs to create a stereo image․ Important Note: Stereo mini plugs require conversion plugs to adapt to the standard phone jacks on the MG06X․ Ensure a secure connection for optimal audio transfer․
These line inputs offer a clean and direct signal path, bypassing the microphone preamps․ They are ideal for sources that already have sufficient gain and require minimal processing․
Phantom Power: Condenser Microphones
Condenser microphones require phantom power to operate correctly․ The Yamaha MG06X provides 48V phantom power, accessible via the [PHANTOM 48V] switch․ Crucially, engage this switch only when using condenser microphones․ Dynamic microphones do not require phantom power and could potentially be damaged by it․
Before activating phantom power, ensure all cables are securely connected to prevent unwanted pops or noise․ Once engaged, the switch illuminates, indicating that phantom power is active on the corresponding channel(s)․
Always remember to turn off phantom power before connecting or disconnecting microphones to avoid potential damage or loud noises․ Proper use of phantom power ensures optimal performance and extends the lifespan of your condenser microphones․

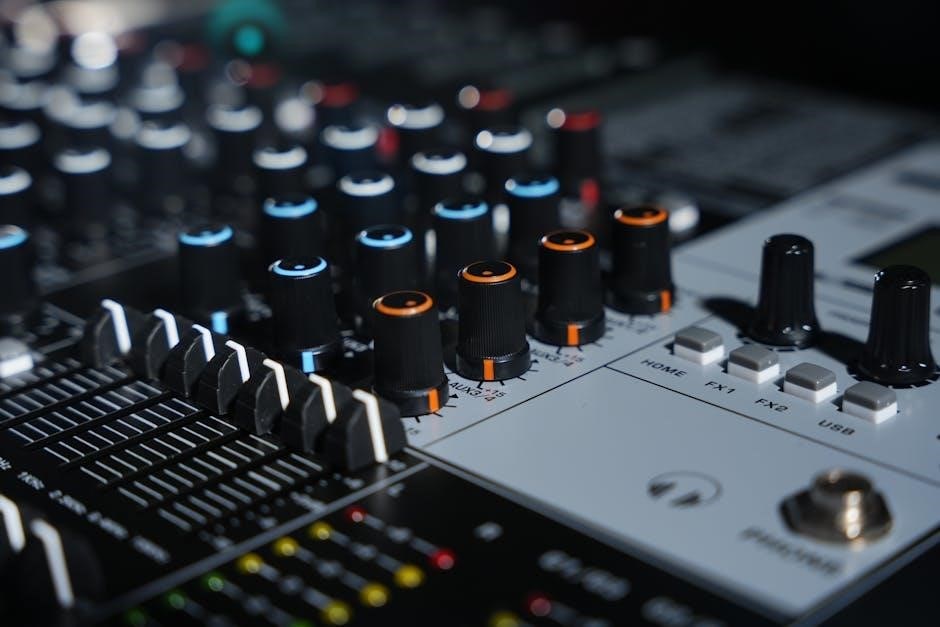
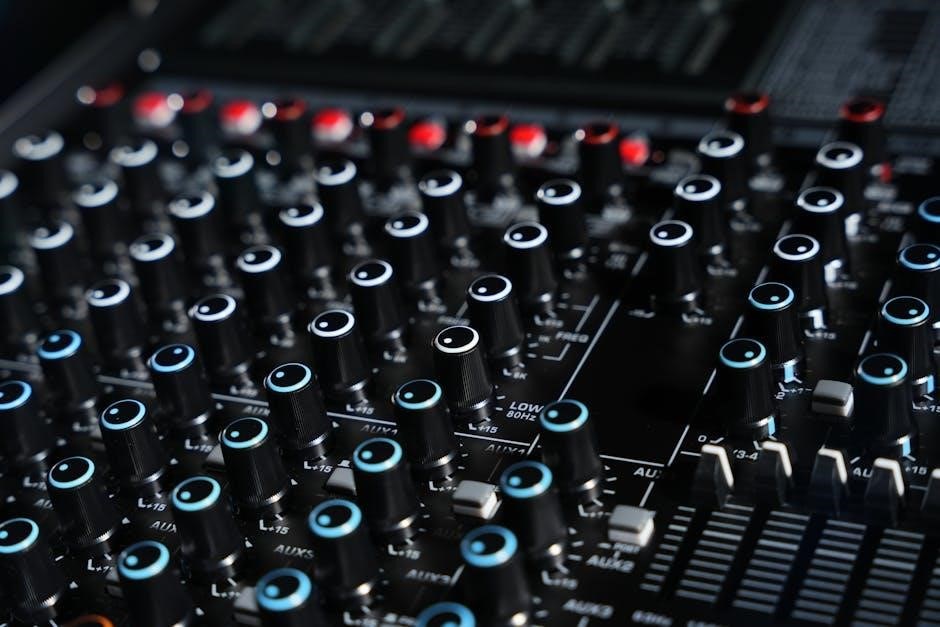
Understanding the MG06X Controls
Explore the intuitive layout! This section details the MG06X’s controls – gain, levels, equalization, and PAD switches – for precise audio management and optimal sound shaping․
Channel Gain and Level Controls
Gain control adjusts the input signal strength for each channel, crucial for achieving a healthy signal-to-noise ratio․ Increasing gain boosts the signal, while decreasing it reduces it; finding the sweet spot prevents distortion or weak audio․
Level control, often referred to as the fader, determines the output volume of each channel․ It operates after the gain stage, allowing you to fine-tune the overall mix balance․ Proper gain staging – setting the gain appropriately before adjusting the level – is vital for optimal sound quality․
Remember, the channel represents the path where sound enters the mixer․ Adjusting these controls effectively ensures a clean, balanced, and professional-sounding mix․ Experimentation is key to understanding how these controls interact and impact your audio!
Carefully monitor the signal levels to avoid clipping (distortion) and ensure sufficient headroom for dynamic range․
Equalizer (EQ) Section
The Equalizer (EQ) section on the MG06X allows you to shape the tonal characteristics of each channel․ It provides control over the frequency content of the audio signal, enabling you to enhance clarity, reduce muddiness, or add warmth․
Typically, the EQ features high, mid, and low-frequency controls․ Boosting frequencies emphasizes those tones, while cutting them reduces their prominence․ Use EQ subtly to correct imbalances or creatively enhance sounds․
Understanding frequency ranges is key: high frequencies affect brightness and air, mids contribute to body and presence, and lows define fullness and depth․ Experiment with different settings to achieve the desired sound for each input source – microphone, instrument, or audio device․
Proper EQ usage can significantly improve the overall mix quality and intelligibility․
PAD Switch Functionality
The PAD switch on the Yamaha MG06X, specifically found on channels 1/L and 2/R, is a crucial feature for managing input signal levels․ It attenuates the input signal by a specified amount, preventing distortion and clipping when dealing with exceptionally strong signals․
This is particularly useful when connecting high-output sources like active microphones or line-level instruments directly to the mixer․ Engaging the PAD switch reduces the gain, allowing you to maintain a clean and clear signal path․
Without the PAD switch, excessively loud signals can overload the input circuitry, resulting in unwanted distortion and a compromised audio quality․ Always monitor the input level meters and engage the PAD when necessary to ensure optimal performance․
The PAD switch expands the MG06X’s versatility, accommodating a wider range of input sources․

MG06X Features & Functions
Explore the power! The MG06X boasts Yamaha’s D-PRE preamps, SPX digital effects (on the MG06X model), and a convenient stereo level control for enhanced audio․
Yamaha D-PRE Microphone Preamps
Yamaha’s D-PRE microphone preamps are a cornerstone of the MG06X’s exceptional audio quality․ These preamps have been meticulously designed to deliver a remarkably natural and musical sound, even at high gain settings․ They faithfully reproduce every nuance of your source, providing a clean and transparent signal path․
Unlike many conventional preamps, the D-PRE design utilizes an inverted Darlington circuit․ This unique configuration provides exceptional linearity and minimizes distortion, resulting in a warm and detailed sound․ The D-PRE preamps are capable of handling a wide range of input signals, from delicate vocal performances to powerful instrument sources․
They contribute significantly to the MG06X’s ability to capture the true essence of your sound, offering a professional-grade audio experience in a compact and affordable package․ This premium head amp ensures high-quality sound reproduction for all your audio projects․
SPX Digital Effects (MG06X Only)
The MG06X distinguishes itself with integrated Yamaha SPX digital effects, offering a versatile toolkit for enhancing your audio․ These high-quality effects provide optimum processing for vocals and instruments, adding depth and character to your sound․ The MG06X features six distinct SPX effect types, allowing for creative sonic exploration․
These effects include reverb, delay, and chorus, each meticulously crafted to deliver professional-grade results․ They are easily accessible and intuitive to use, making them ideal for both live performances and recording sessions․ The SPX effects can be seamlessly integrated into your signal chain, adding polish and refinement to your mixes․
Yamaha’s SPX effects engine ensures a pristine and transparent sound, preserving the integrity of your original audio while adding subtle or dramatic enhancements․
Stereo Level Control
The MG06X incorporates a dedicated Stereo Level control, crucial for managing the overall output volume sent to your stereo speakers or recording devices․ This control allows precise adjustment of the master output level, ensuring a balanced and optimized sound․ It functions independently of the individual channel levels, providing a final stage of gain control․
Proper use of the Stereo Level control prevents clipping and distortion, safeguarding your equipment and preserving audio quality․ Adjusting this control allows you to match the output level to the input requirements of your connected devices, such as amplifiers or audio interfaces․
Careful monitoring while adjusting the Stereo Level is recommended to achieve the desired loudness without compromising clarity or introducing unwanted noise․ It’s a vital component for achieving a professional and polished sound․

Technical Specifications & Troubleshooting
Explore detailed technical specifications, including the block diagram, dimensions, and input/output characteristics․ This section also provides solutions for common operational issues encountered with the MG06X․
MG06X Block Diagram
The MG06X’s internal architecture begins with the microphone and line inputs, feeding into Yamaha’s renowned D-PRE microphone preamplifiers․ These preamps deliver exceptionally clean and detailed sound․ Signal routing then proceeds to the channel’s equalizer (EQ) section, allowing precise tonal shaping․
Following EQ, signals are directed to the channel faders for level control․ The stereo inputs bypass the preamp stage, directly entering the EQ and fader control․ All channel signals converge at the stereo bus, where the stereo level control manages the overall output volume․
Crucially, the MG06X incorporates Yamaha’s SPX digital effects processor, offering six distinct reverb and delay types․ These effects are integrated into the signal path before the stereo bus․ Finally, the master output stage provides balanced XLR and unbalanced TRS outputs for connecting to external recording devices or amplification systems․ The block diagram illustrates this signal flow, showcasing the MG06X’s efficient and versatile design․
Input and Output Characteristics
The MG06X boasts versatile input capabilities, featuring microphone inputs with a specified input impedance of 1․2kΩ․ Line inputs, designed for instruments or audio devices, present an impedance of 10kΩ․ Maximum input gain for microphones reaches +60dB, ensuring sufficient amplification even for low-output sources․ Line inputs accommodate signals up to +10dB․
Output characteristics include balanced XLR outputs with a 0dBu output level and an impedance of 600Ω․ Unbalanced TRS outputs deliver the same 0dBu level with a 1kΩ impedance․ The frequency response spans from 20Hz to 20kHz, ensuring faithful audio reproduction․
Signal-to-noise ratio is an impressive 80dB, minimizing unwanted noise․ Total harmonic distortion remains below 0․02% across the audible spectrum, guaranteeing pristine sound quality․ These specifications highlight the MG06X’s commitment to professional audio performance․
Troubleshooting Common Issues
No Sound? First, verify the power adapter is securely connected and the mixer is powered on․ Check all input and output cables for proper connections․ Ensure channel gain and level controls aren’t set to minimum․ Confirm the selected input source is active and the [PHANTOM 48V] switch is engaged if using condenser microphones․
Hum or Noise? Ground loops can cause hum․ Try different power outlets or use a ground lift adapter (with caution)․ Ensure cables aren’t running near power cords․ Check for faulty cables or connectors․ Excessive gain can introduce noise; adjust levels accordingly․
Distortion? Reduce channel gain or the input signal level․ Engage the PAD switch on channels 1/L and 2/R if the input signal is too strong․ Verify the input source isn’t clipping․
Maintenance and Care
Keep it clean! Regularly wipe the MG06X with a dry cloth․ For storage, disconnect all cables and protect it from dust and extreme temperatures․
Cleaning the MG06X
Routine Cleaning: To maintain the MG06X’s appearance and functionality, regular cleaning is essential․ Always disconnect the power adapter from both the mixer and the electrical outlet before commencing any cleaning procedures․ Use a soft, dry cloth to gently wipe down the exterior surfaces of the mixer․ Avoid using liquid cleaners, solvents, or abrasive materials, as these can damage the finish or internal components․
Dust Removal: Pay particular attention to removing dust from the knobs, faders, and connectors․ Compressed air can be used cautiously to dislodge dust from hard-to-reach areas, but avoid directing the air stream too forcefully․ For stubborn dirt or grime, lightly dampen the cloth with water, ensuring it is wrung out thoroughly to prevent moisture from entering the unit․

Connector Care: Clean the input and output connectors periodically with a contact cleaner specifically designed for electronic equipment․ This will help ensure optimal signal transmission and prevent corrosion․ Remember to allow the contact cleaner to dry completely before reconnecting any cables․

Long-Term Storage
Preparing for Storage: If you plan to store your Yamaha MG06X for an extended period, proper preparation is crucial to prevent damage․ Begin by thoroughly cleaning the unit, as detailed in the ‘Cleaning the MG06X’ section, removing all dust and debris․ Disconnect all cables and store them separately to avoid strain on the connectors․
Environmental Considerations: Store the mixer in a cool, dry environment, away from direct sunlight, extreme temperatures, and humidity․ Ideal storage conditions are within a temperature range of 10°C to 30°C (50°F to 86°F) and a humidity level below 70%․ Avoid storing the mixer in areas prone to dust accumulation or pest infestation․
Protective Measures: Consider using a protective cover or placing the mixer in its original packaging to shield it from physical damage during storage․ Periodically check the storage environment to ensure conditions remain optimal․


Be the first to reply